

You must have read my blog on connecting Business Central with Power Automate. And, if you are interested in using APIs that Business Central does not expose, you are at the right place.
Today, we'll dive into the exciting world of custom connectors in Power Automate. If you're like me and love to get things done efficiently, especially when working with Microsoft Dynamics 365 Business Central, custom connectors are your secret weapon. So, let's explore how to create custom connectors for Business Central in Power Automate, but let's keep it simple.
What's the Deal with Custom Connectors?
You might wonder, "What are these custom connectors all about?" They're like your personalised bridge between API and Power Automate. They help you work with custom data, add new features, and link up third-party services seamlessly.
Building Your Very Own Custom Connector
Now, let's get down to the nitty-gritty. Creating a custom connector doesn't require you to be a tech wizard. Here's how you can do it:
Step 1: Define the API Endpoint
First things first, you need to know where you're going. Identify the API endpoint for your Business Central connection. It usually looks something like
Here are the steps to create one if you are new –
1. Open your business central URL and select the company for which you would like to create an API.Note: There will be a unique API endpoint for each company
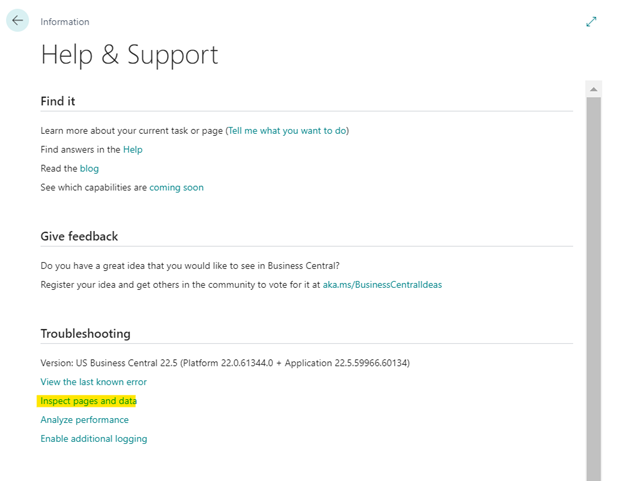
2. Inspect the page that you want to create an API on. This is useful when there are custom fields or custom pages not exposed by Business Central in Power Automate.3. You can do that using the Help menu on the screen's upper-right corner -> click on Inspect pages and data.
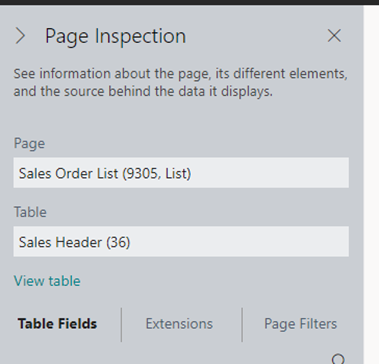
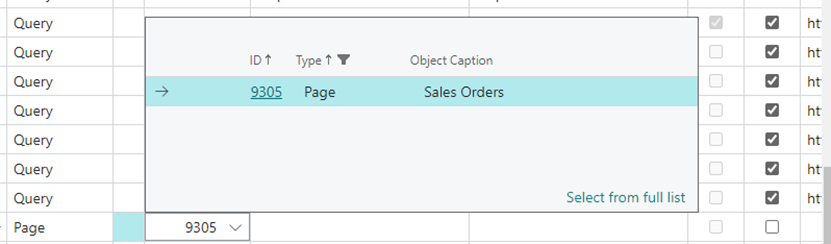
Open the page you want to create an API for and remember the page number; it would be 9305 in the below case.
4. Search for web services and create a page-level web service with the page number you inspected above.
And click on the publish check box.
5. Copy the OData URL; it is your API endpoint for the page.
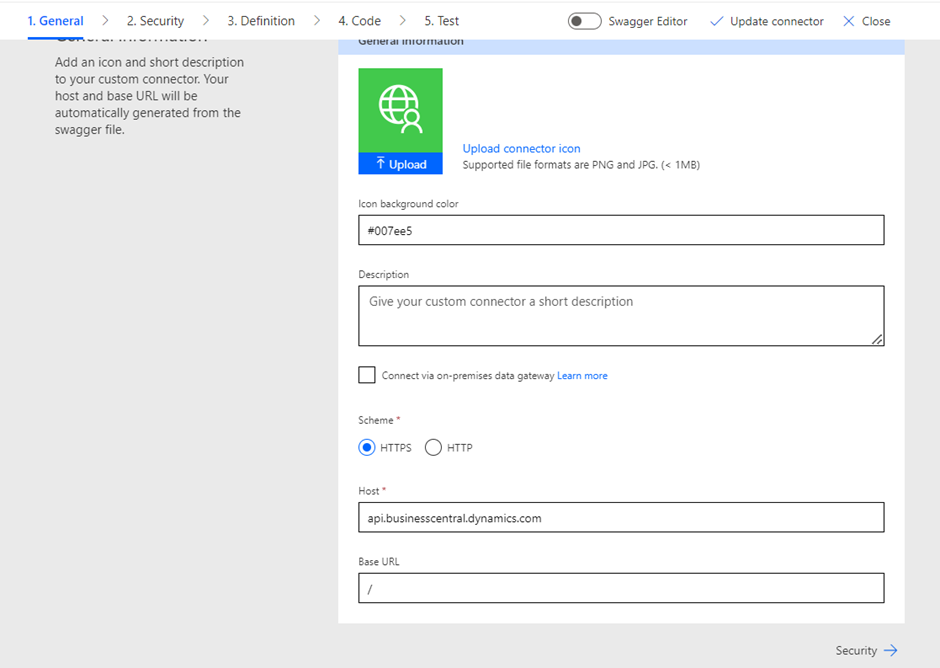
Step 2: Create the Connector
Head over to Power Automate and navigate to the Custom Connectors section. You'll need to provide essential info like the API endpoint, how you will authenticate, and any custom headers you want to use.
Step 3: Choose Your Authentication Method
You've got options! You can set up various authentication methods, like OAuth 2.0 or API keys, to keep your connection safe and secure. Business Central supports Oauth2.0. I will show you detailed steps to use Oauth2.
1. The first step is to register your app with Azure
Steps
- Login to Azure Portal (Use the same credentials as your Dynamics 365 Business Central).
- Once you have logged in, navigate to the option “Azure Active Directory” and click on “App registration”.
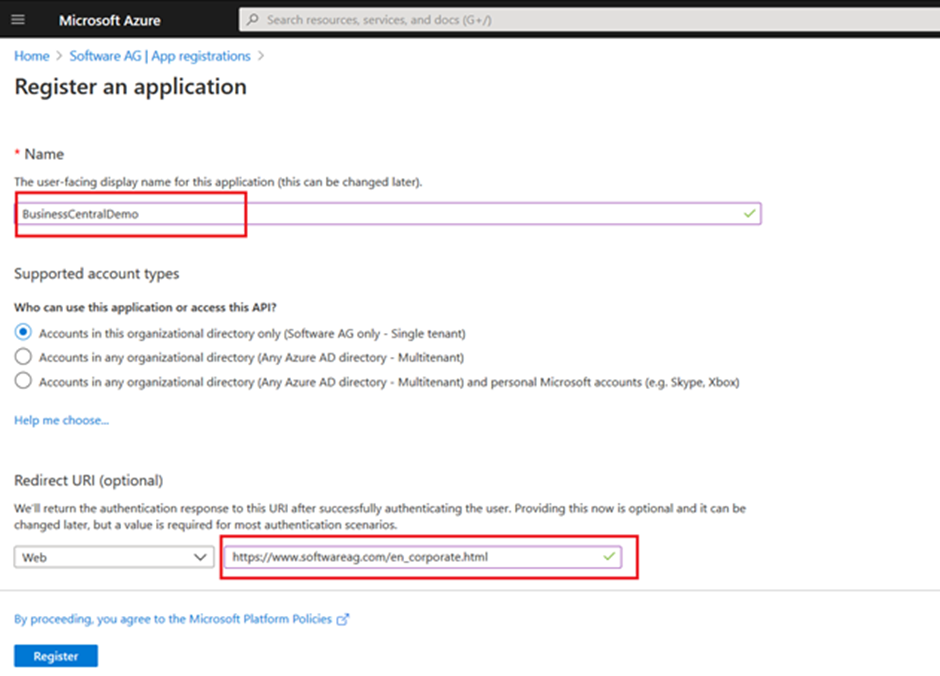
- Click on “New registration”
- Add the Necessary information for the App, like “Name” and “redirect URL”, and click on Register.
Supported Account types: - Users can choose from the options based on their needs. For more information about the supported scopes, click “Help me choose…”
In the URL field, enter the URL using which you need to obtain the OAuth authentication token in response to the request from the URL. Users can use any accessible URL, e.g. http://www.google.com or any other
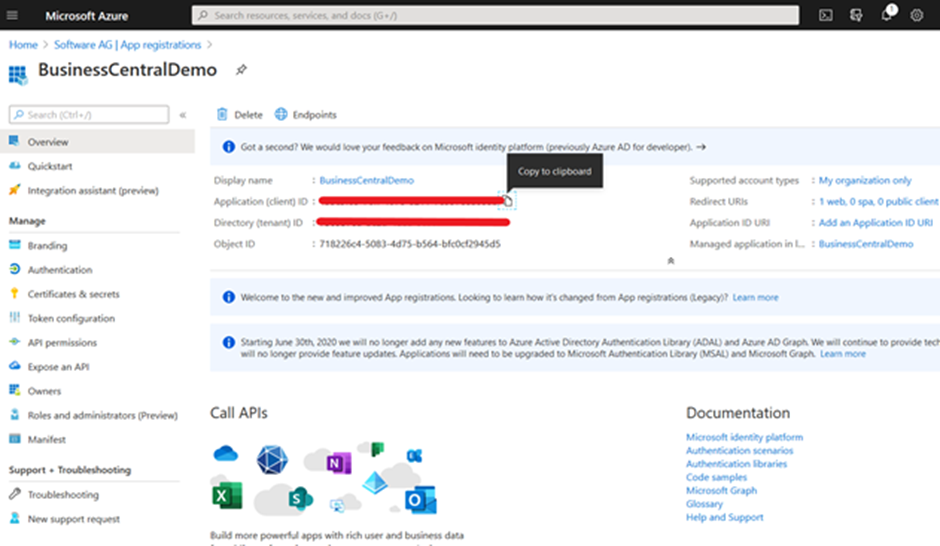
5. It will take a few seconds to create an application for you. Please note the Application ID; you will need it when connecting to Dynamics 365 Business Central using OAuth.
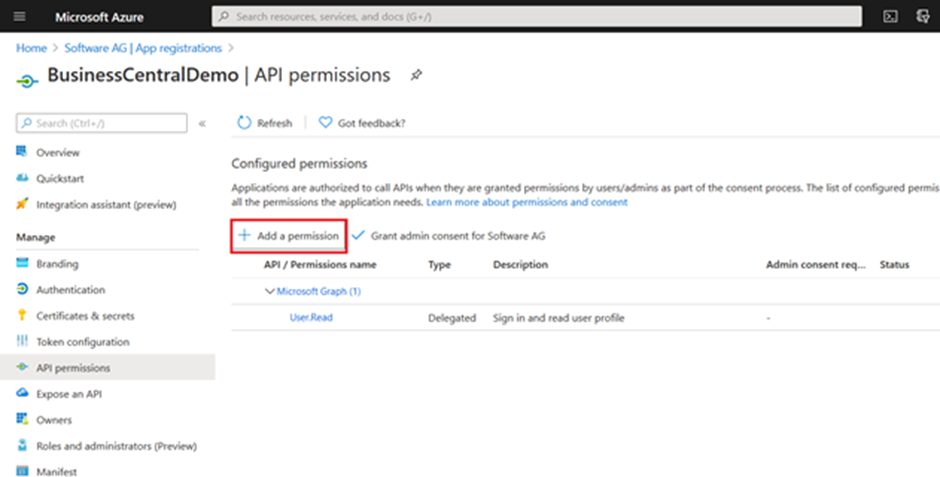
6. Click on API Permissions; it will show all the available permissions. Users can add more required permissions by clicking the “Add a permission” button.
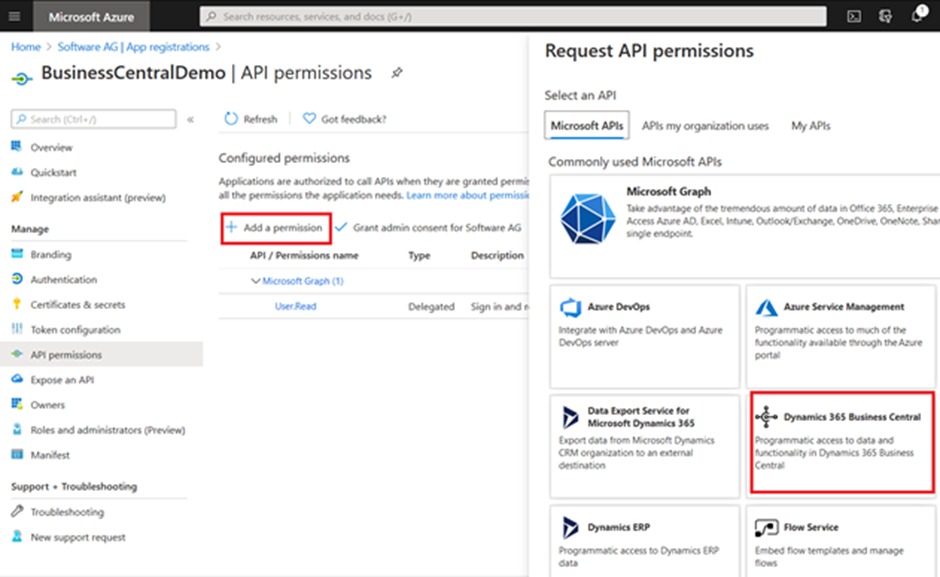
7. Select the API “Dynamics 365 Business Central” from the API Listing menu and click on that.
Note: If the user wants to use Microsoft "PAID" offerings, the user needs to get the License to use the desired Microsoft APIs for the tenant.
8. Select all the available permissions in the wizard, Delegated and Application permissions (if available), and click on the “Add permission” button.
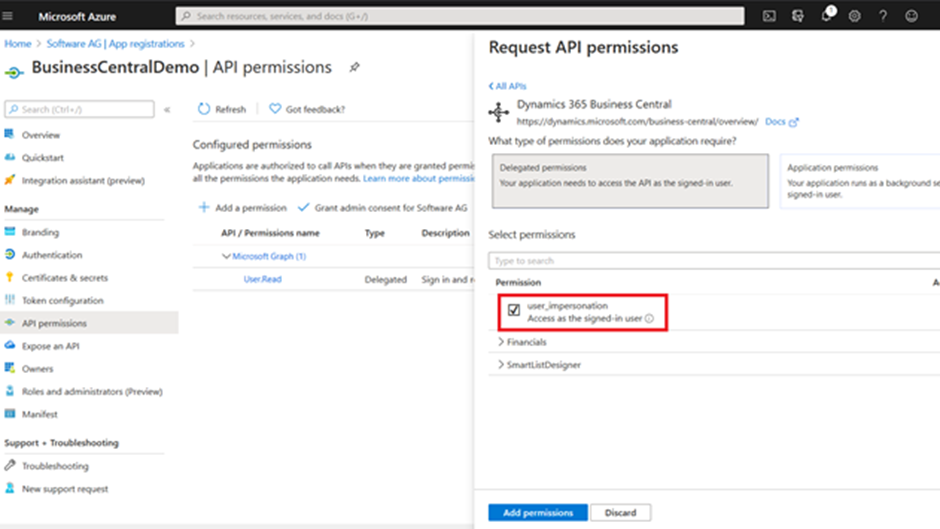
9. After selecting all the necessary permissions, the user must click the “Grant admin consent” button. Click on “Yes” to grant admin consent.

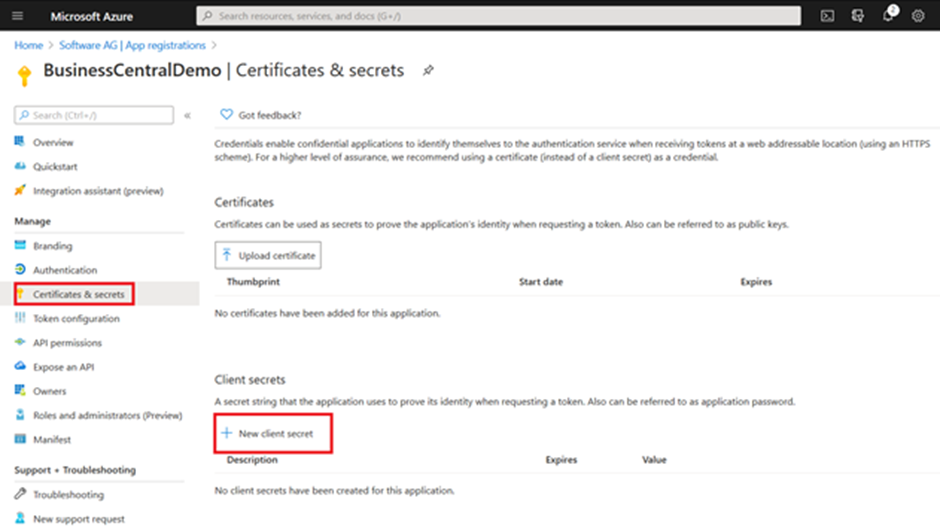
10. Users can also generate the “client_secret” via the below-mentioned process.
- Click on Certificates and Secrets and then click on New Client Secret.
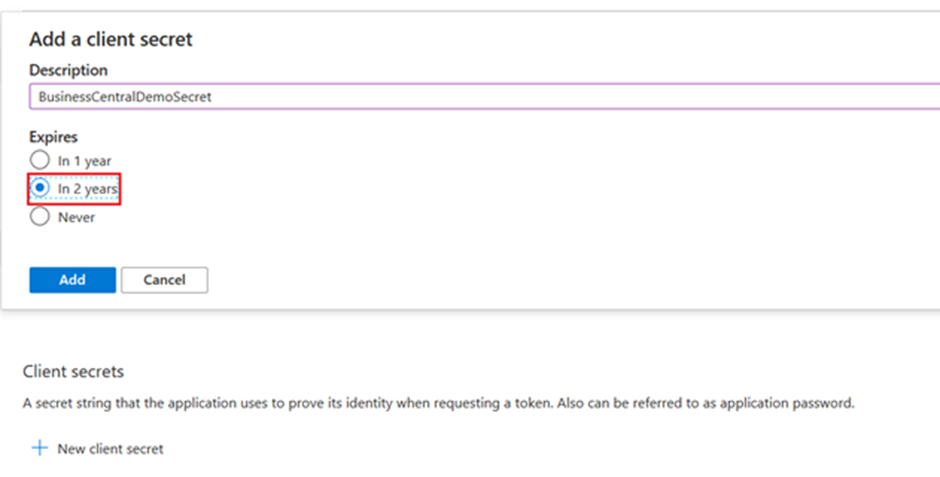
- Choose the desired time duration for your secret key and click on the Add button.
- Your Client secret will be generated. Store it for use during Access Token generation.
11. Now, We have done all the necessary settings that we require to generate the Access_token. We will use the “Postman” client to generate the Access_token. Set up a GET call request with the base URL as below.
GET https://api.businesscentral.dynamics.com/v1.0/api/v1.0
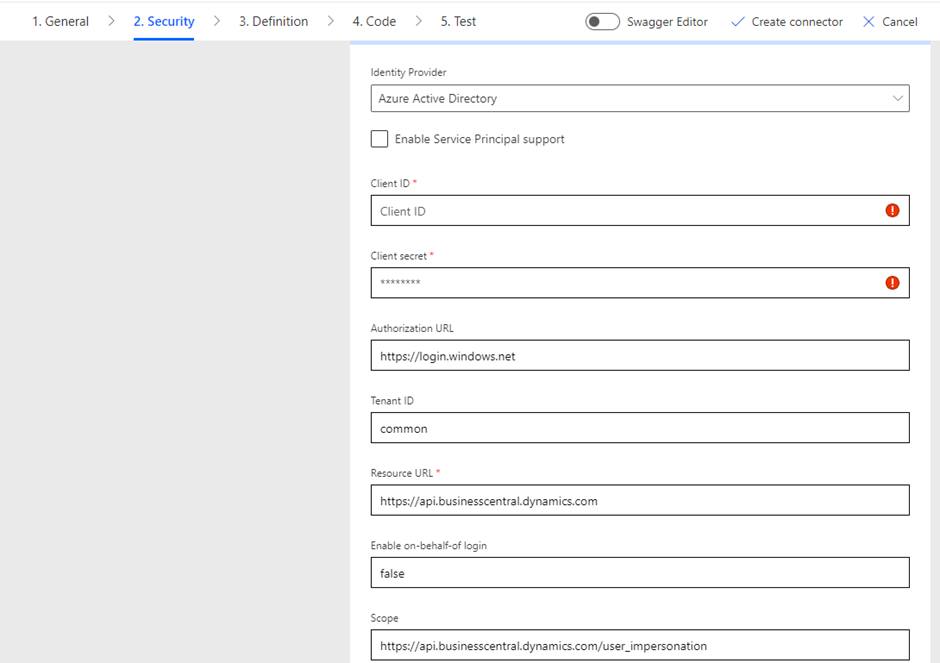
2. Please choose Azure Active Directory under Identity Provider and enter the client ID/secret generated above. Ensure you use the Authorization URL, Tenant ID, and Resource URL as mentioned below.
Step 4: Define Your Actions and Triggers
This is where you customise your connector's superpowers. Specify the actions and triggers you want to use. You can set up actions for retrieving customer data, posting invoices, or triggering specific workflows when something cool happens in Business Central.
Add an action; in my case, it was GET
Under Request, please click on import from the sample and enter the API; I entered the web API we had created in the very first step.
Step 5: Test It Out
Now, let's put your custom connector to the test. Make sure it works like a charm and does what it should. Power Automate provides tools to help you with this.
Conclusion
Custom connectors in Power Automate are your secret sauce for getting things done in Business Central. They let you work with custom data, supercharge your workflows, and integrate with third-party services effortlessly. So, if you're looking to level up your Business Central game, give custom connectors a try. They're your ticket to a more efficient and automated workday. Happy automating, my friends!