
Prior to Power Automate (formerly Microsoft Flow), many of us probably sent emails using a workflow in Dynamics 365. This option has been around for quite some time. Typically, we have some automated process where emails go out to notify internal personnel or external customers.
Power Automate now provides the same concept of sending Dynamics 365 emails. However, there are few things to be aware of, and the setup is different.
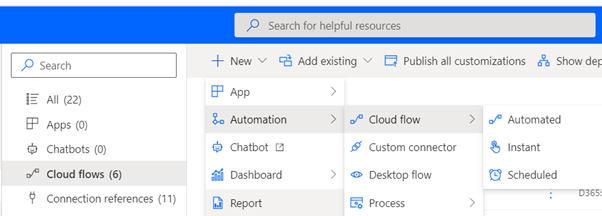
First, we will need to create the flow from within a solution. Creating a solution is most preferred way to do it. If you are not familiar with this process, it's pretty easy.
- Navigate to https://flow.microsoft.com
- Log in with your credentials
- Click "Solutions" on the left
- Click "New" at the top, give the solution a name and Publisher, and then save it. This will show the solution in the solution list.
- Click on the new solution name to open it.
Steps to create a basic D365 flow
- Click on New and you would find three options to create a cloud flow – automated, instant, and scheduled. We would be choosing automated flow. If you would like to run flow at a scheduled time, you may choose Scheduled flow.
- We will use Microsoft Dataverse as a trigger to connect Dynamics 365. The trigger to connect to D365 was earlier known as Common data service (CDS) but is now deprecated.
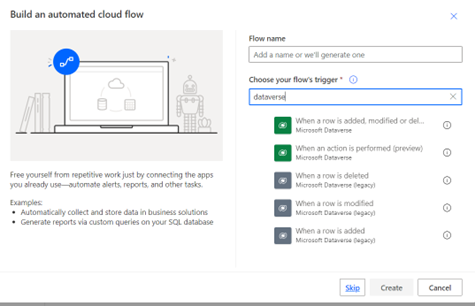
Give a friendly flow name and click on create, or you can also choose to skip or you can also choose to skip
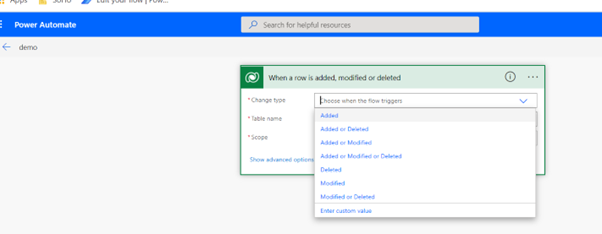
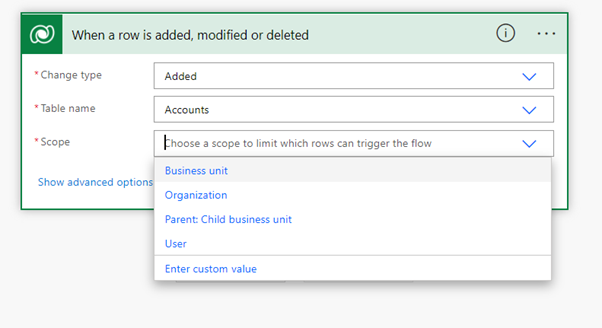
- Select table name on which you want to fire this flow.
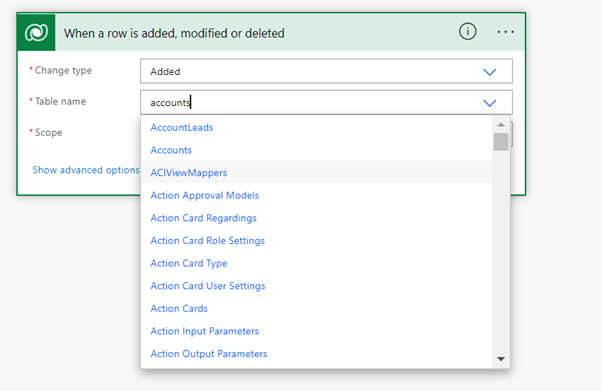
- Select the scope of the flow. Scope will have same meaning as we have the scope of workflows in D365. It can be on organization, business unit or user level
On clicking advanced options, you will find additional options like selecting columns, filtering rows and run as whom. The column names would be the logical names from D365 like accountid, name and likewise.
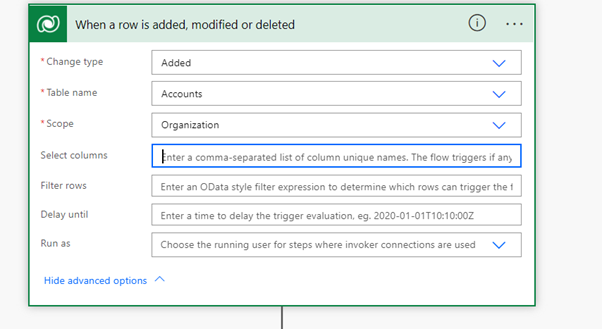
- For change type as Modified, we can also choose on which column change we would like to trigger this alert. For example, if we want an email to be sent on changing status, we will set this column value as statecode. Here, if we do not select any column, it will trigger an alert whenever the record changes.

- If you want to fetch a particular row from D365, Get Row by ID would be the best pick. You can specify which table to fetch it from and Row ID would be the unique identifier (GUID). Example: to fetch name of the user and his email, you can add “modified by” (@{triggerOutputs()?['body/_modifiedby_value']}) from the record that was created or updated.
- List Rows would be helpful where you have more than one rows being returned. You can specify the table name, select columns which needs to be in the fetched (this is important as fetching all columns will affect the performance).
Filter Rows will act as a condition and Fetch XML Query is one of the best conditional tools (according to me). A little bit of background on Fetch XML Query – to use it, please open D365 and click on Advanced Find and add the filter parameters and select columns you need. Click on Download Fetch XML. Simply copy whole contents from the downloaded file and you are good to go.

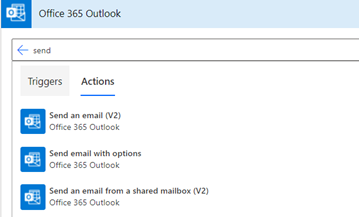
- Now that we have all the information we need, we can click on send email. Below are the different options we have to send an email –
There you are – your first flow is ready to go.