

Introduction
There are two ways to create Approvals to send to Teams using Power Automate as listed below:
Use Power Automate “Create an Approval” action and use the Approval action adaptive card and sent it to Teams User/Channel
Use “Post an Adaptive Card to Teams Channel/User and wait for response”, here you can create your own adaptive card with approval actions you want the Approver to take
This blog post talks about 1st option “Start an Approval” action of Power Automate to send Approval request to Teams Channel. We will talk about the second option in Part 2 of this blog post.
Scenario
I will use the scenario of Teams Provisioning Solution, where any user can request a new Team to be created in Teams and that request goes to approvers. If approved, then it will create a new Team in Microsoft Teams.
I have a SharePoint List where users will go and create a new Teams Request. Below is the structure of the SharePoint List. Once an item is created, the approval will be sent to a specific Team Channel that all approver users are part of and any one of the approvers can provide their decision.
- List Name: Teams Requests
- List Columns:
- Title – Single line of text
- Description – Multiple line of text
- Private Team? – Yes/No
- Owners – People and Group (allow multiple)
- Members – People and Group (allow multiple)
Create the Flow:
- To create the Flow, Go to Power Automate -> Create -> Start from Blank -> Automated Flow
- Give an appropriate name for the Flow and select the “When an item is created” trigger and click on Create button
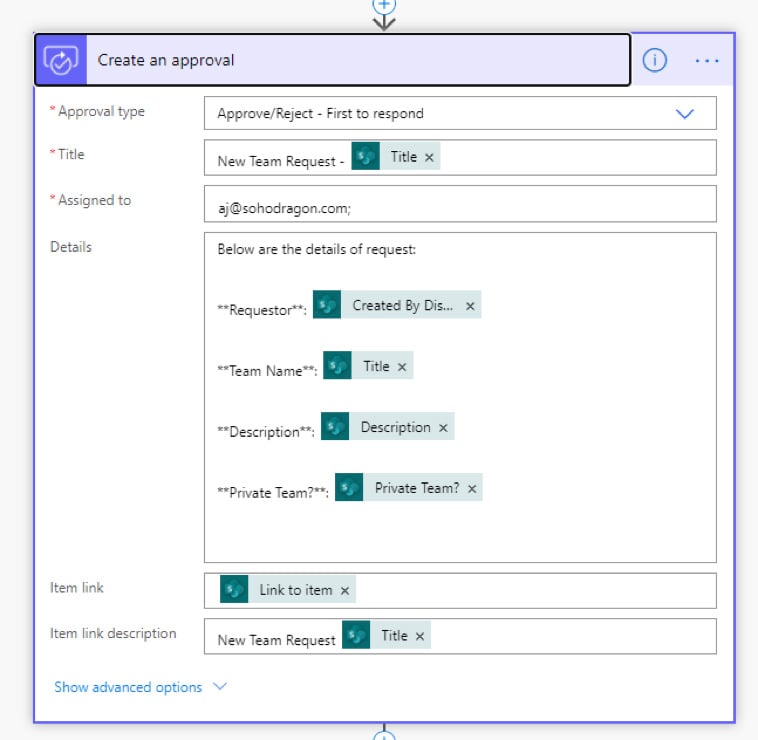
- Add “Create an Approval” action
- Approval Type: Select the approval type as per your requirements, I have selected first to respond option. So, approval will complete once any one approver who responds first to the request.
- Title: Specify the title of the approval request
- Assigned to: Provide list of approvers
- Details: Provide the details of approval request, if you want to format the content here, you need to format using Markdown syntax
- Item Link: Provide link to SharePoint List Item “Link to Item”
- Item Link description: any name of the link
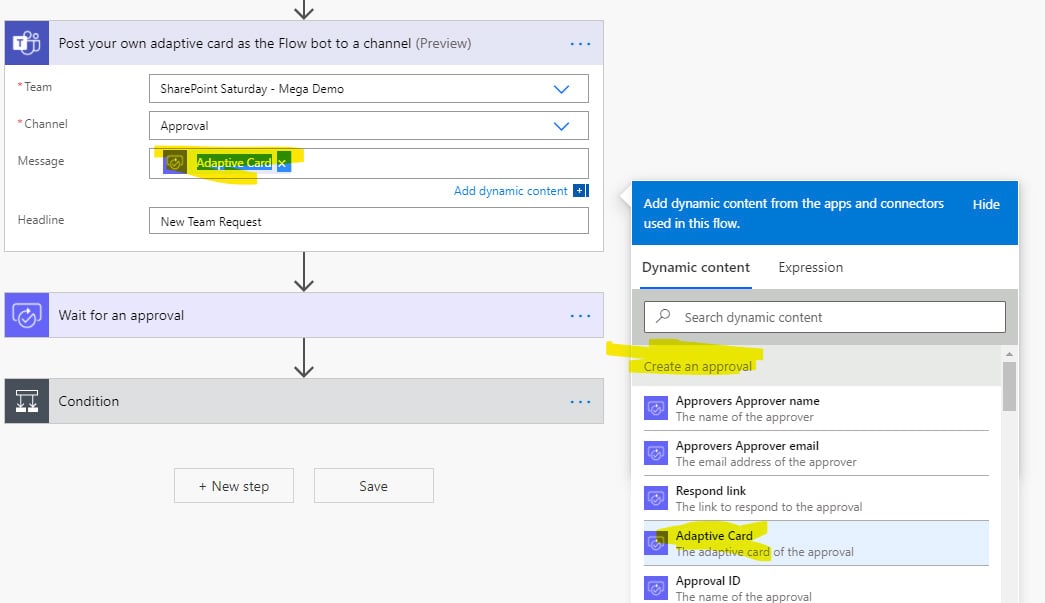
- Now add “Post your own adaptive card as the Flow bot to a channel” action
- Team: Select the Team in which you want to post the approval
- Channel: Select the Channel in which you want to post the approval
- Message: From Dynamic Content “Adaptive Card” property of “Create an approval” action
-
- Headline: Provide appropriate headline of the message
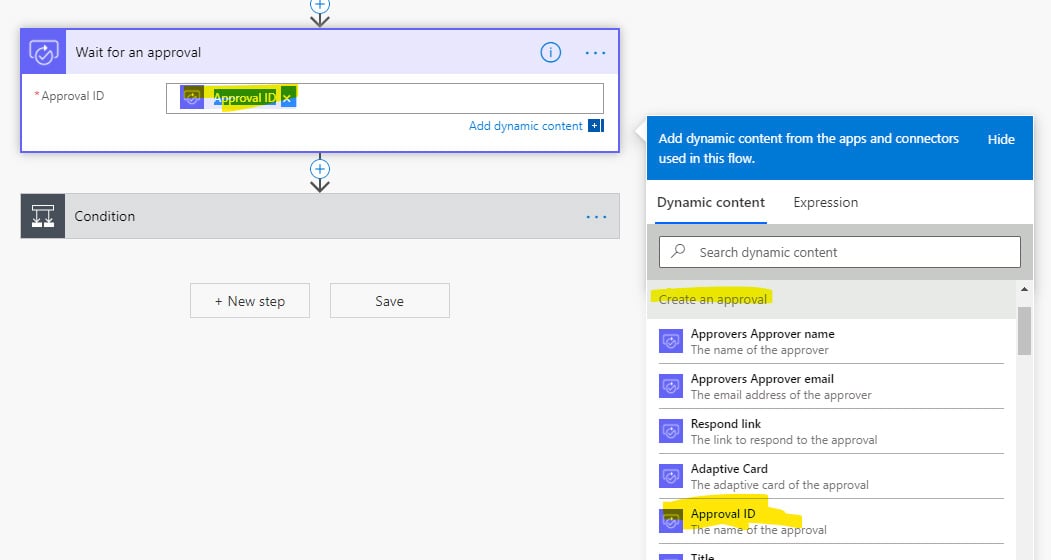
- Now add “Wait for an approval” action, from Dynamic Content select “Approval ID” under the “Create an approval” action
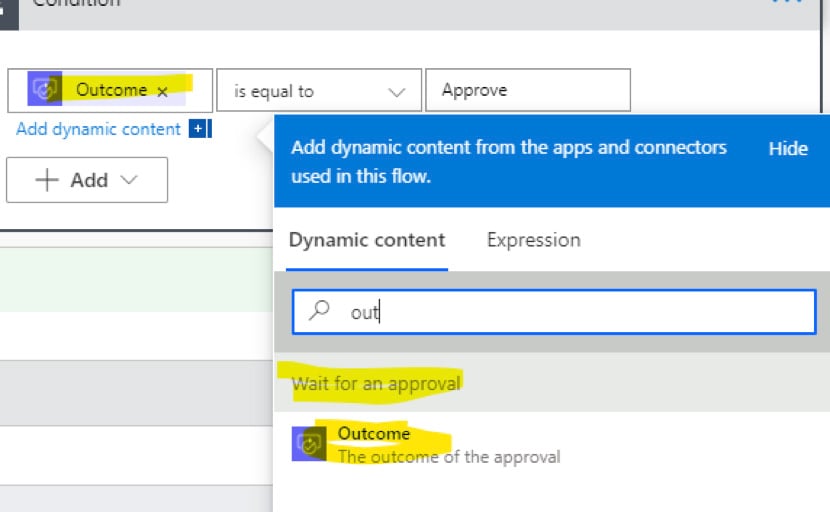
- Now add “Condition” action to check the decision provided by approver. Select from Dynamic Content “Outcome” under “Create an Approval” action, select “equal to” from dropdown and provide “Approve” in the input box of the condition
- Under the “No” branch to send message to the requestor that approval is rejected, do following:
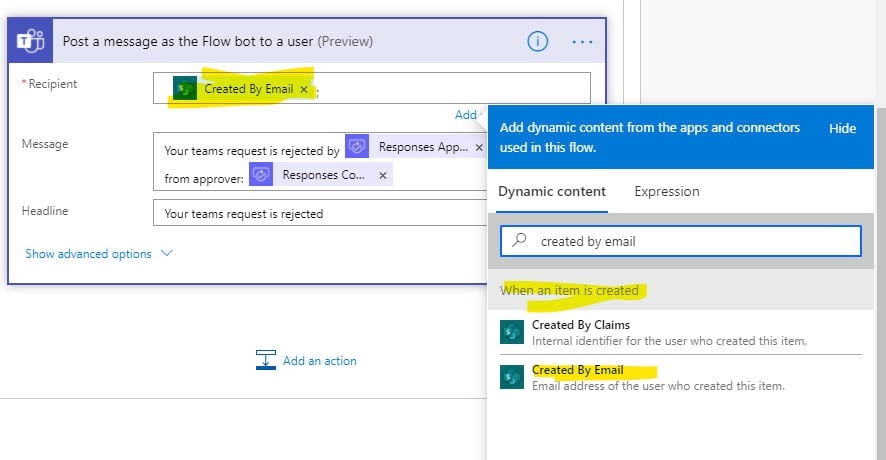
- Add “Post a message as the Flow bot to a user” action
- Recipient: From dynamic content select “Created by Email” under “When an item is created”
-
- Message: Provide appropriate message. You can include comments provided by approval while providing the approval decision and the approver name from the dynamic content “Responses Approver” and “Responses Comments” under the Wait for an approval.
- Headline: Provide appropriate headline of the message
- Note: Here instead of sending message on team, you can also send an email to the requestor.
- Under “Yes” branch of condition we will create new team:
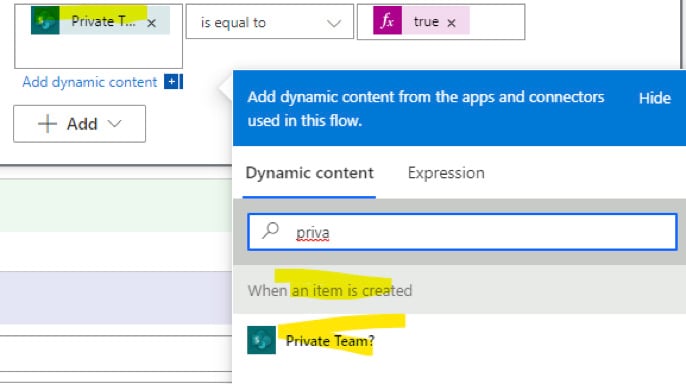
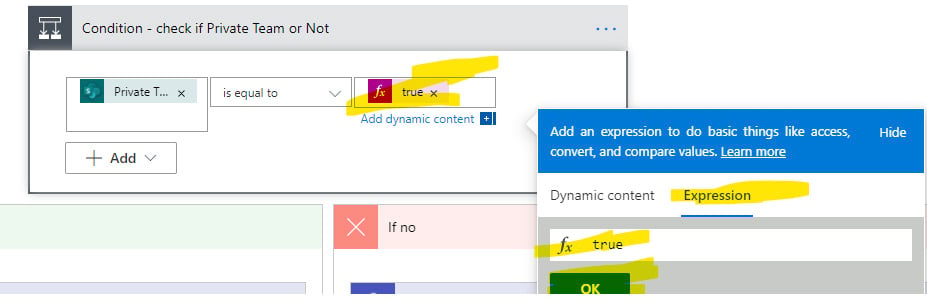
- Add “Condition” action to check whether the item has Private Team request or not
- In the Condition dynamic content, select “Private Team?” under “When an item is created”, select “equal to” from the dropdown, for the value: in the expression box, type “true” and click on Ok button.
- Add “Condition” action to check whether the item has Private Team request or not
-
-
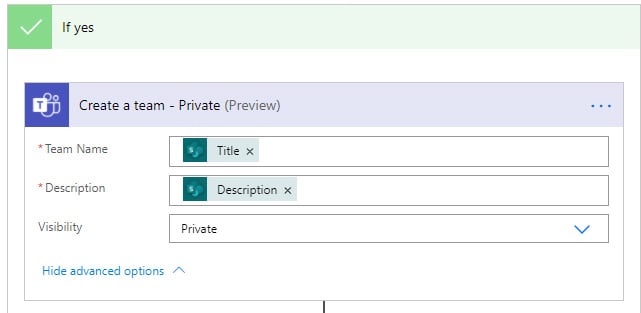
- Under the “Yes” branch, add “Create a team” action
- Team Name: From Dynamic Content select “Title” under “when and item is created”
- Description: From Dynamic Content select “Description” under “when and item is created”
- Visibility: Select “Private”
- Under the “Yes” branch, add “Create a team” action
-
-
-
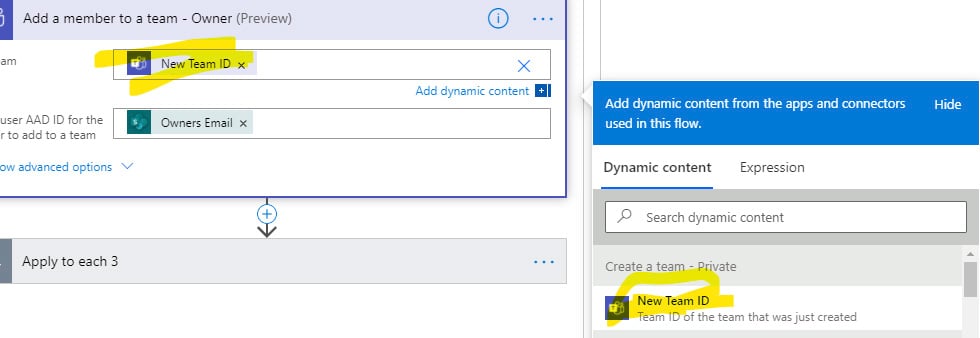
- Under the “Yes” branch Add “Add a member to a team” action
- Team: select from dynamic content: New Team ID
- Under the “Yes” branch Add “Add a member to a team” action
-
-
-
-
- User: Select “Owners Email” under “When an item is created”
-
-
-
-
-
- Should the newly added user be an owner of the team: Select Yes
- Note: This will automatically add Apply to Each action under which the “Add a member to a team” action will be added, as the Owners is of multi-valued field type
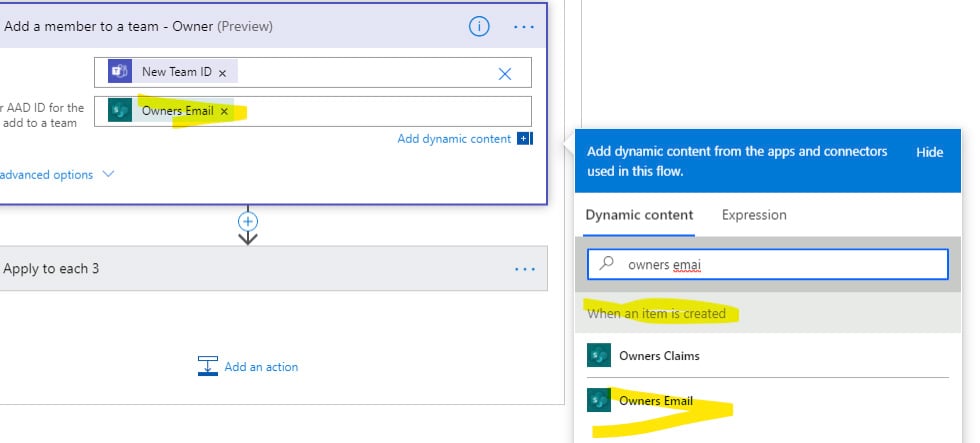
- Again add “Add a member to a team” action
- Team: select from dynamic content: New Team ID
- User: Select “Members Email” under “When an item is created”
- Should the newly added user be an owner of the team: Select No
- Note: This will automatically add Apply to Each action under which the “Add a member to a team” action will be added, as the Members is of multi-valued field type
- Under the “No” branch Add “Add a member to a team” action
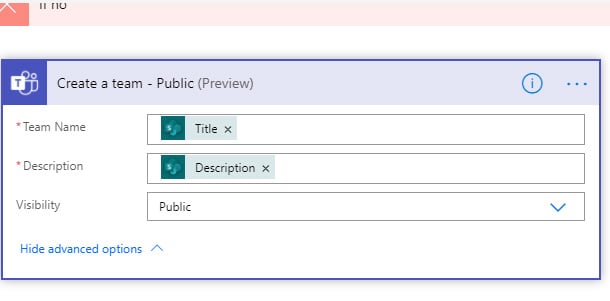
- Add “Create a team” action
- Team Name: From Dynamic Content select “Title” under “when and item is created”
- Description: From Dynamic Content select “Description” under “when and item is created”
- Visibility: Select “Public”
-
-
-
-
- Outside of condition which checks for private team add “Post a message as the Flow bot to a user” action
- Recipient: From dynamic content select “Created by Email” under “When an item is created”
- Message: Provide appropriate message
- Headline: Provide appropriate headline of the message
- Note: Here instead of sending message on team, you can also send an email to the requestor.
- Outside of condition which checks for private team add “Post a message as the Flow bot to a user” action
-
So, this blog outlines basic of creating Team Provisioning solution using Power Automate, SharePoint and Power Automate. In part 2 of this blog we will review how to create custom approval using adaptive cards.